Friday, November 21, 2008

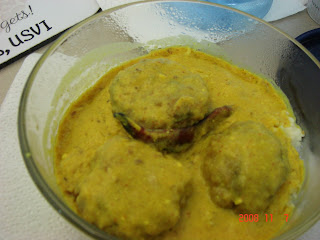
Eggs in Saffron Cream Sauce

A long day at work followed by a trip to school to meet my advisor does not leave any energy to cook anything for dinner. But don't want to eat out nor eat any left-overs in the fridge - now what to do? Try to make the cooking interesting and try something new and simple yet special - and thus, I tried this saffron cream sauce. Made eggs with this sauce, however, I am sure this will taste equally good with chicken, lamb and shrimp and of course, Paneer. A little heavy, but I am sure a Epicurus delight!!


Ingredients - Makes 3 servings

{Onion(1 large)-Ginger(1 inch)-Garlic(6 cloves)-Green chilli(3-4)-Tomato(1 large)} paste - 12 tbsp

Warm Milk - 1/2 cup
Saffron - 1/4 tsp

Eggs - 8
Canola oil - 1-2 tbsp
Cumin seeds or Jeera - 1/4 tsp
Green chillis - 3-4, chopped
Tomatoes - 1.5, chopped
Chicken stock - 1 can
Heavy cream - 3-4 tbsp

Boil the eggs (Rachel Ray's tip - Take the eggs in cold water. Bring it to a boil. Stop the heat, put a lid and keep it aside for 10-15 mins). Poke them with the fork. Heat a little bit of oil and stir the eggs in the hot oil for the egg to brown a bit. Keep it aside.

Heat a tbsp of Canola oil. Add cumin seeds and chopped green chillis. As the cumin seeds brown, add the onion-ginger-garlic-green chilli-tomato paste. Keep cooking it till all the liquid has evaporated and the raw smell is gone. It becomes a little lumpy and oil starts separating.

Add the chopped tomatoes and let it cook. As the tomatoes are half-cooked, add salt. Continue cooking. When the tomatoes look 3/4th done, add a can of chicken stock. Bring it to a boil and let it simmer for about 5 mins.

Add the milk-saffron mixture and let it continue cooking for another 5 mins. Add about 3-4 tbsp of heavy cream. Let the mixture simmer for another 5 mins. Add the cooked eggs and let it simmer for about 5-10 mins.

Serve warm with some piping hot rice - Enjoy the earthy flavors of saffron balanced by the heavy cream!!

Sunday, November 9, 2008

Karismatic Kadhi (not inspired by Ekta Kapoor or Karan Johar in anyway)

Colors of Fall are fast going away with the fast intruding winter. Here is a picture of the fall colors from my office window. Isn't it great?


Meanwhile, with a busy work schedule, I am looking for one-dish wonders that can serve as dinner and lunch for next day tiffin. Seems like gone are the days when I can conveniently plan and cook multiple things..alas! Atleast for the next month or two. One such recipe that I have tried recently is KADHI!


I first had Kadhi at my undergraduate hostel. And I hated it! Little did I realize that this was not how Kadhi was meant to be. I believe in the northern part of India, Kadhi Chawal (rice served with Kadhi) is a prime comfort-food. Now I understand why...I had some onion-spinach fritters lying around in the fridge. A few days back, my dear friend Ekta had bought Kadhi-Chawal for lunch made from the similar fritters..why not take a stab at it using the Kadhi recipe from fellow bloggers and see if I can make it? This was my first take and need I say that this has been added to my comfort-food list as well :)

These are all the recipes that I referred for the Kadhi gravy base:

  • Soma from eCurry
  • Tarla Dalal-ji's Rajasthani Kadhi Pakodi Link
  • Gujarati Kadhi Link
  • Punjabi Kadhi Link
I did not find any particular difference between the different versions. If anyone knows the exact difference between Punjabi, Gujarati and Rajasthani Kadhi, please let me know.


For the Spinach-Onion Pakora aka Fritter

Ingredients - Makes 30 to 35 Pakoras

Spinach - 1 bag
Onion - 1 large
Besan - 2 cup
Salt - as per taste
Turmeric Powder - 1/2 tsp
Ajwain - 1/2 tsp (Tip - Adding this to fritters makes it easy to digest.)
Coriander leaves - a few sprigs, as per taste
Chilli powder as per taste or 3-4 finely chopped green chillies
Water - a few drops, if required
Oil - For frying, enough to make the pakoras be fully immersed in the oil

Put everything together and mix them. Only if you still need water, add a few drops. Don't make it too runny. You should be able to make rounds of the mixture with your hand and drop into the oil. Have water in a bowl beside you when you make the balls. Quickly dip your hand into the bowl of water. While you hand is wet (not runny wet), take a portion of the above mixture and try to make it into a ball. Drop it into a pot with hot oil. Have it hot enough such that the pakora does not burn on being dropped into the oil but is warm enough to keep it together and lets it cook.

For the Kadhi:

Ingredients for gravy

1 cup plain yogurt
1/4 cup of besan ( Chick pea flour)
1/2 teaspoon turmeric
2 tsp red chilli powder
Salt to taste
1 tablespoon of garlic paste

Ingredients for Seasoning the gravy
1 teaspoon Fenugreek seeds
2 Red Dry Chilis
2 Clove
1″ stick of cinnamon
1 Small green cardamom
A pinch of Asafoetida
1 tablespoon of chopped curry leaves
1 tablespoon Oil ( You can use the left over oil after frying the pakoras)
1/2 inch piece of ginger very finely chopped

Preparation:

In a large bowl, mix yogurt, besan, garlic paste, salt, red chilli powder and turmeric powder. Mix it well with an egg beater, so there are no lumps of the besan. Add about 4-5 cups of water and beat for some more time till it becomes a smooth mixture with no lumps. Don't worry about the amount of water - it will reduce in the cooking process.

Heat 2 tablespoons of oil and the cinnamom, cloves and cardamoms. After a minute, add the dry chilis, asafoetida and fenugreek seeds. Once the seeds start to splutter add the ginger and fry till the onions start to brown.

Add the yogurt-besan mix to this and boil at high heat. Once it boils, reduce the heat to Medium and let it continue cooking till the raw smell of besan has vanished. When the mixture is cooked, add the curry leaves, salt and the pakoras. Boil for another few minutes and now its done. Total cooking time for the gravy is near about 30 to 45 minutes.

Ingredients for Tarka

1 teaspoon ghee
1/2 teaspoon Cumin seeds
1/2 teaspoon mustard seeds

Heat the ghee, and add the Cumin and the mustard seeds. Once they start to splutter - pour this immediately over the prepared Kadhi.

Tuesday, November 4, 2008

Mmmm Malai Kofta


Kofta is something I had never made before. Really strange..somehow this has always evaded my cooking list till date. This recipe is from my dear friend Prajakta. We were sidies (a slang term meaning people staying in next door dorm rooms :) ) during our undergraduate days and were good acquaintances at that time. Now we work in the same company and have become good friends. We had to come all the way across the world to get to know each other better! :) It has been over a year since she gave me this recipe. It was a big hit when she made it for her son's birthday. I recently got a chance to make it when R's Bua-ji and Phuffa-ji were visiting us. It turned out good. Posting this here to share with everyone and for future reference.

Just this weekend, when we visited my SIL, she had made a similar kofta with potato and cauliflower. That was yummy and a good variation from the paneer koftas. I think even well-cooked peas can be added to these koftas.


Ingredients (Makes eight to ten servings)

Potatoes - 2 cup
Paneer/Cottage Cheese - 2 cup

Corn flour: 6 tbsp
Salt - as per taste
Ginger - 1/2 inch, about 1 tbsp
Garglic - 6 cloves, about 2 tbsp
Fresh ground pepper - 1/4 tsp
Green chillis - 4-5 chopped

Cumin seeds - 1/2 tsp
Onion: 1 medium
Yogurt - 1 cup
Ground Poppy seeds: 1 tbsp
Tumeric powder - 1/2 tsp
Garam masala: 1 tsp
Curry powder - 1/2 tsp
Tomato: 2 medium
Heavy cream - 4 tbsp
Coriander leaves - a few sprigs

Canola oil - 2 tbsp + extra for frying the koftas

Cooking:

Soak the ground poppy seed in yogurt and keep it aside.

Boil potatoes and peel them.Mash them and mix it with grated paneer. Add corn flour, salt, ginger, garlic, pepper and chillies. Make small balls or squares of this dough and fry at medium heat. Koftas are ready.

In separate container heat 2 tbsp canola oil, add cumin seeds, onion(finely chopped or grated). Once onion turns pink, add the poppy seeds and yogurt mixture to it. Mix well. You can even grind this. Add turmeric powder, curry powder and garam masala to this. When the paste is well cooked, add tomatoes and 3 cups of water. Add salt. When this is well done, add fresh cream and cook for a few minutes.

Just before serving add the koftas to the curry. If you add koftas to the curry and cook, they will break since the koftas are very soft. Add finely chopped coriander before serving as garnish.

Enjoy with warm rotis or rice pulav with raita/papad.

Sunday, October 26, 2008

Delicioso Bhelpuri aka Mudi Masala


Ingredients

Bhel Mix - 2 cups (Tip - You can get these in Indian stores. If you can't find it, use plain Bhel\Mudi\Muri with some mildly spicy mixture)
Onion - 1/2 small
Tomato - 1/2 small - deseeded, just use the flesh
Green chilli - 2-3
Coriander Chutney - 1 tbsp ( I use Swad brand)
Sweet Tamarind Chutney - 2 tbsp (I use Swad band)
Coriander leaf - a few sprigs
Boiled Potato - 1 small, chopped into tiny cubes

Mix them all together and serve immediately. Yes, you are done! :)


A no-cook recipe..always convenient to make when you get guests suddenly or if you are out on a picnic. You can increase or decrease the ingredients based on your taste and preference.

This is known commonly as Bhelpuri - a savoury snack from Bombay Chowpatty - seaside snack stalls. It is widely known as Mudi Masala or Jhal Mudi in Odissa - a slightly different version. The crunch of the onion, softness of the tomato and potato with the spiciness of the chutneys make it an irresistable lip-smacking snack..slurp!!

I first learned of this particular combination from my dear friend Vaishnavi during one of our many cherished barbecue get-togethers. Thanks, Vaish!

Sunday, October 19, 2008

My Santa Fe, New Mexico experience - Part 1


Chilli Ristras adorning the corridor of a hotel in Santa Fe - Real Chillis !?! Yes! A quite common sight in New Mexico...

Hi All!

As I mentioned in my last post, lot of exciting things happening lately in my life. I have taken on a new role at work and learning a lot of new interesting things. As a result of this change, I have a more organized life now and get to concentrate more on my programming skills. Love it. Hope to keep the learning experience going...

I have not mentioned in my earlier blog posts that in addition to working in IT field, I am also pursuing my Ph.D. degree. As part of the research experience and exposure, I got to attend a much coveted "Summer School" program at Santa Fe, New Mexico. It was a 10-day program where they exposed us to the astronomer's virtual observatory tools for 8 days and we got to develop a project based on the learning in the remaining 2 days. The learning itself was a prize in itself - however, my project also won a prize in the IT category. It was a team project involving me, two researchers from Italy and one researcher from Belgium - we could easily form the United Nations :)

Surprise package of this summer school was that there was an Indian film crew staying in the same hotel. It was none other than Hritik Roshan and his film "Kites" crew, heroine Barbara Mori and dad Rakesh Roshan. I got to talk to him for a few seconds. He was real cool and very courteous. No wonder everyone likes him so much and is all praise for him. It was a great experience. Unfortunately, I did not get a pic with him and that remains my constant crib with myself...boo hoo!! Catch-line is that I met a star at an astronomy conference..who can beat that? ;)

Santa Fe is an exotic and a wonderland. People are very friendly and warm. I had a great time enjoying the art, culture, the ongoing fiesta and the landscape. The Native American art is so enthralling and enrapturing. If I had my way (and a flight back where I did not have to pay $15 for the first luggage being checked in, $25 thereafter), I would have bought them ALL! Now I am all set that I will decorate our new house with those types of arts and crafts. Take a look at some of the pics and you will understand my obsession!


In addition, the landscape is so gorgeous and varied. The houses have such an unique architecture - the adobe structures makes you feel so much closer to nature and gives out a raw earthy feeling. Maybe I will retire there like the talented artist Georgia O'Keefe - another one to my ever-growing list of places to retire in! :) If you are ever in Santa Fe, do visit the museum dedicated to her - the colors of her paintings are so exotic and pure! One art that particularly caught my attention was a painting of a shell - much much better than a photograph with excellent lighting!

There are so many churches all over the downtown of Santa Fe. That was a Sunday well-spent by walking around Santa Fe and enjoying the ongoing Fiesta. Very colorful..reminded of Bali Jatra held in Cuttach Barbati Stadium. For the uninitiated wondering what the heck is Bali Jatra, it is an annual fair held with much fanfare and a wonderful occasion for family outing. I have been there only twice, however, the memories from those visits are still fresh. That was some good times!


St. Francis Cathedral


Miracle staircase of Loretto Chapel - Note the turns. Believed to have been built by St. Joseph who appeared as a carpenter to help the sisters.


San Miguel Chapel

As part of the Fiesta, they burn a huge structure called the Zozobra. Something a lot akin to the Diwali Mela's Ravan burning. It is also similar in concept of doing away with all the evils of our lives by burning the Zozobra. People have been known to leave their sad letters, legal notices or any other memorabilia that reminds anyone of a sad event in a box near the Zozobra and it is all burnt with him. People send items to burn from all over New Mexico. Here is a pic of the Zozobra.


Will have another post soon where I will post the pics of the terrain and the amazing landscape of this wonderland - Los Alamos, Taos, Jemez Mountains, Jemez Springs, White Rock Overlook and the food - how can I not mention that? ;)

Sunday, October 12, 2008

Some Odiya Roasted Dishes - Brinjal and Tomato Poda

Hi there! I am back from my blogging break. It's been a while with lot of exciting things that I would like to share with everyone. Will do so in my next post. Till then, enjoy these healthy recipes from my kitchen to yours. Look forward to hear from everyone around and catch up.

In Oriya household, lunch is heavy while dinner is light. Lunch includes rice, dal with or without a non-veg item and two to three accompaniment dishes. One of the accompaniment dish can be xyz poda (aka roasted xyz) where xyz can be brinjal or tomato, for example. I did not quite cherish them earlier but I am craving for them now. Considering our effort to eat healthy and have more variety, this is a good option to try out. Maa should be proud of me now, I hope! :)

My food habits have changed so much in the last 4-5 years, almost akin to the out-of-body experience. You get the picture, right? ;) Maa and Baba were shocked on their recent visit. Maa kept on saying "Now you eat it :D You have wasted so much of this in your childhood..hmmp", "Where did you learn this?", "How can you eat this?" :) I took some of my childhood-forceful-eating revenge on Maa as well by making her eat asparagaus and she just refused to take another bite..you should have seen the joy on my niece's face on finding someone else sharing her dislike for asparagaus. Food constitutes about 75% of all my memories, I guess! :))

Before I divert too much, let's get to the recipe for Baigana Poda (aka Roasted eggplant) and Tomato Poda (aka Roasted Tomato). Sorry, no pictures available right now. However, when I make them next time, I will sure to click a pic and include it here.

Baigana Poda (aka Roasted eggplant)

Ingredients  
Makes 4servings

Eggplant - 1 large
Garlic - 2-3 cloves (FYI - Garlic pod is the grouping of the garlic gloves)
Mustard oil - few drops
Chopped Onion - 1/2 small or 1/4 medium
Grated ginger - 1 tsp
Heavy cream - 2 to 3 tbsp, as per taste
Chopped Green chilli - 2-3
Salt, as per taste

Method
  • Do not make this with cold eggplant. Make sure it has reached room temperature before trying out the rest of the steps. Else it will not roast well.
  • Using a fork, poke holes in the eggplant. If possible, make thin slots and place cloves of garlic in the slot
  • Brush the eggplant very lightly with few drops of mustard oil.
  • Roast on high heat on the stove till the peel burns. Continue to roast on low heat for the eggplant and the garlic to cook.
  • Alternatively, broil in oven for 20 mins, turning side after 10 mins. Or, cook at 400 degrees F for 20-30 mins.
  • Keep it aside for 5-10 mins for it to cool down a little. Wrap it in aluminium foil - I have found that makes it easier to peel the skin. Though, remove the garlic and keep it aside.
  • Remove the burnt peel and mash the remaining portion of the eggplant.
  • Add salt, chopped onion, grated ginger, roasted garlic, heavy cream and chopped green chilli. Mix it well.
  • You can add a few drops of mustard oil for added flavor. You can also add aloo bharta (Heat oil. Add cumin seed, chopped onion, ginger-garlic paste and mashed potato. Cook till it stops sticking to the side of the utensil.) and mix it well.


Update on 05/04/2012 - Adding the pic - long overdue. :)

Sunday, August 31, 2008

Off blogging till October

Hi All,

I will be off from blogging till October and possibly, November too. Will be travelling a bit during this period along with entertaining family and friends which is bound to take up a lot of my time. In addition to all this, I am starting to take a new type of assignment at work and completion of school work. Too many things to do before the end of the year..please keep me in your thoughts and prayers. Everyone, take care and have a great time!

Have a great day!

Tuesday, August 19, 2008

Simei Upma (aka Vermicelli Upma)


Come weekend and a pretty relaxed one where there is no activity planned out. Feel like having a filling breakfast for a change and want to have something different and not too rich in taste.

How about taking another shot at simei upma? Had tried it a few times before and it had either turned out too bland for our taste or too mushy..yuck! This time, I went about googling and found this and this by dear Archana and Shilpa respectively. Thanks, guys! Ended up with a combi of the two recipes. Here is the final result that we loved to devour and have a satisfied weekend breakfast. A good option for weekday office lunchbox as well!

Ingredients Makes 3 servings

Bambino Vermicilli 1 and 1/2 cup
Canola Oil 1 tsp
Ghee 1 tbsp
Mustard seeds 1/2 tsp
Green chillies 3
Curry leaves - 8-10
Urad dal 1/2 tsp
Chana dal - 1 tsp
Cashew - 10
Chopped onion - 1 small
Chopped carrot - 1/2 cup
Green peas - 1/2 cup
Turmeric Powder - 1/2 tsp
Asafoetida - 1/8 tsp
Sugar 1 tsp (Increased or decreased according to taste)
Salt - 1 tsp, or as per taste
Lime juice - 1 tsp

Method

  1. Heat ghee and fry the vermicilli till it turns out slight brown in colour. Keep it aside. If vermicelli is not fried properly, it becomes soggy.
  2. In the same pan, pour canola oil. Add mustard seeds allow to splutter.
  3. Add green chillies curry leaves, urad dal, chana dal/cashew.
  4. Add onion, carrot, green peas. Add turmeric.
  5. Add asafoetida.
  6. Add 2 cup hot water and bring to boil. Note - The quantity of water largely depends on the vermicelli type. Also, and stir till the vermicilli cooks (Tip - After cooking for sometime, if the vermicelli is still uncooked, add water in very little quantity - 1/3 cup at a time - and repeat if you still need more water.).
  7. To this, add the ghee-roasted vermicilli, sugar and salt. This upma tastes great when it is a balanced taste of sweet and spicy. Stir together.
  8. Turn off heat and add lime juice. Mix well.
  9. Keep it covered for a few more minutes with heat turned off for the semia to settle down and for it to remain in string form.
  10. Add additional ghee before serving for additional taste. Serve hot. A shot of tomato ketchup also enhances the flavors!

We enjoyed it a glass of fresh squeezed orange juice.


This goes for the WBB - Combi Breakfasts event being hosted by dear Latha of Masala Magic. The due date for this event is August 31st.

Thursday, August 14, 2008

Cuttack-ia Dahi Bara Aloo Dum with CLICK post and a Me-Me


Dahi Bara (aka Dahi Vada) with Aloo Dum is a favourite street-food of the city of Cuttack in Orissa. Dara Bara is urad dal fritters in spicy yogurt gravy. You can't escape from the aroma of the same from the street vendors. Very enticing, I should say!

Cuttack is a very vibrant city in Orissa. It is more than thousand years old and was the capital of Orissa before Bhubaneswar. I have plenty of memories of the fun-filled summer vacations at my granny's place. My cousin would plan all the outings - movies, eating out and visiting other relatives. Time would just fly by. This is also the city where I was born. :) Check out more about Cuttack in wikipedia here.

When my mom was here with me last year, she laid out this fan-fare for us one evening. Amazing! Sending this to the event Curry Mela being organized by Srivalli of Cooking 4 All Seasons. The due date for this event is August 20, 2008.


Dahi Bara recipe Makes about 20-25

Urad dal - 1 cup
Rice flour - few tbsps, about 2 tbsps
Salt - as per taste
Ajwain seeds - 1/2 tsp
Canola oil - for deep frying

Yogurt gravy

Canola oil - 1 tbsp
Mustard seeds - 1 tsp
Dry red chillies - 2-3
Curry leaves - about 6-10
Grated ginger - 1 tbsp
Salt - as per taste

Ground and roasted cumin-red chilli powder - as per taste

  • Soak urad dal overnight.
  • Blend it in food processor next morning and let it sit at room temperature for the urad dal to ferment. On summer days, usually by evening, it is adequately fermented.
  • If the mixture is too free-flowing, add a few tbsps of rice flour to thicken it. It should be thick enough such that you can just hold the mixture with your hand and fry it. It should not be too thick or too thin.
  • Add salt and ajwain seed. Mix well.
  • Deep fry in hot canola oil. Put your hand in the water before taking the mixture in your hand. The prevents the mixture from sticking to your hand.
  • Keep stirring the bara in the oil so that it is uniformly cooked.
  • Once removed from the oil, drop it into a bowl of water. It will remove the excess oil and make the bara soft and easy to soak the yogurt mixture.
  • How to prepare the yogurt mixture? Heat a tbsp of canola oil. Add mustard seeds. Once it crackles, add dry red chillies, curry leaves and grated ginger. Beat the yogurt with some water to thin the yogurt. Add the oil mixture to the yogurt with salt and ground roasted cumin-red chilli powder.
  • How to prepare the ground and roasted cumin-red chilli powder? Dry roast 1 cup cumin seeds in a hot pan. When the cumin is half-done, add 1 cup whole red chilli (no need to pack it in the cup). Continue roasting till the flavors are easily detectable. Note of warning - It is pungent. So keep your exhaust fan on and if possible, a window or door open.
Aloo Dum

Potatoe - 5 large
Onion-Ginger-Garlic-Tomato paste - 10 tbsps (Blend 2 onion, 6 garlic clove, 1 inch ginger, 2 tomato)
Dum Masala - 1-2 tbsp
Garam Masala - 1 tsp
Canola oil - 1 tsp
Dry red chilli - 2
Dry bay leaf - 2-3
Salt - as per taste
Coriander leaves - few tbsps

  • Heat canola oil. Add dry red chilli and dry bay leaf.
  • When the chilli and bay leaf is roasted, add the onion-ginger-garlic-tomato paste. Stir and let it cook on High heat. The paste will tend to splutter initially. So take care in this stage. You can half-cover it with a cover, if that helps.
  • Add the dum masala, salt and garam masala and continue cooking.
  • When the raw smell is gone, add the boiled potatoes. Continue stirring and cooking. You can reduce the heat to Medium during this stage. Takes about 10-15 minutes.
  • Garnish with Coriander leaves.
Note - You can have this Aloo Dum as-is with Roti, Paratha or Puri\Luchi.

How to assemble the Dahi Bara-Aloo Dum?
Take two pieces of Dahi Bara in a container. Add a spoon or two of the Aloo Dum. Top it with Bhujia, chopped onions, chopped chilli and coriander leaves. You can add a sprinkle of rock-salt (optional).

Click, Click and click! Love photography even though have always had a problem with the lighting of the pictures. I am working consciously on that aspect of my photography these days. The following is one of the pics that I feel I have done justice in terms of the lighting. The first photo below is my entry to Click: Citrus event due August 30th, 2008.

Enjoy some of the other pics taken by yours truly of the radiantly beaming and shiny fresh oranges, my favourite fruit and flavour lately!


Book MeMe

When Sra tagged me for this MeMe, I was pleasantly surprised and excited. Really appreciate the gesture and for thinking of me, dear Sra! :)

Being the single child and pretty shy one (have surely come a long way since then!), books were my best friends. To date, they are. Give me a good book, I am out of your way for days. When I get gifts for kids, I am perpetually tempted to buy books. However, books are no longer the same craze with kids these days..shocking that even some parents don't appreciate books as gifts!

Coming back to me, I really don't get that much time to read novels these days..thanks to work, school, household work and entertaining friends/families. Not that I mind any of the mentioned items, but I do wish I could make more time and revive my reading passion! And of course, complete the numerous half-read books lying around the house crying to be read and conquered!! :) The one I am using for the MeMe is one of those crying bleeding books...

The rules of the MeMe are the following:
  • Pick up the nearest book
  • Open to page 123
  • Find the 5th sentence
  • Post the next three sentences
  • Tag 5 people and acknowledge the person who tagged you.
The book I am picking is Dan Brown's Angels and Demons. After reading The Da-Vinci code, I bought all his past novels. However, have not been able to read them till date. I picked this one up during our Dominican Republican trip. I still need to finish it..sigh!

Mortati knew that all the exits to Vatican City were guarded, and the missing cardinals could not have gone far, but still with less than an hour before opening prayer, he was feeling disconcerted. After all, the four missing men were no ordinary cardinals. They were the cardinals.

Hope this intrigues you to read this book! So surprising that one of the main plots of this book was in the above lines :)

I would like to tag the following dear blogger friends for this MeMe:

Thanks, everyone, for reading through this long post! Look forward to hear from you. Have a great week ahead and enjoy the Summer Olympics! :)

Sunday, August 3, 2008

Magnetic post - Orange Chicken and a award

This year has been quite eventful so far. Apart from the various trips R and I have taken, we have had a few gatherings at our place to catch up with friends and family. Looking forward to a few more over the course of the coming months. Need to start learning lot more new recipes. I always like to have a few new items when I have anyone visiting us. Or even for potlucks, for that matter. This post has one such recipe that I have tried recently - Orange Chicken.

I first tried Orange Shrimp at P.F.Chang's - tangy and hot invoking all the taste buds! It was four years back and till date, whenever we go to P.F.Chang's I will browse through the menu from the start to finish and end up ordering this each and every time. I am the more experimental one between R and me when eating out..but Orange Shrimp and Pad Thai of most Thai restaurants (not all restaurants make it that good..will not name any here but I know!) are never a matter of compromise :) Tweaked the recipe here based on the comments in there and as per our taste. Disclaimer - It does not taste exactly like the P.F.Chang's Orange chicken, but it was pretty good for home-made. The flavors were there.


Makes 4 to 5 servings

Step 1

Chicken - 1 lb, about 25-30 pieces
Eggs - 2
Paprika Powder - 1/4 tsp
Corn flour - 1/2 cup
Flour - 1/4 cup
Salt - 1.5 tsp
White pepper - 1 tsp
Canola oil - 1 tbsp

Marinade chicken with beaten eggs, paprika powder, corn flour, flour, salt, white pepper and canola oil. Keep aside for about 15 minutes. Tip - During these 15 minutes, prepare the sauce and solution from Step 2 and Step 3 respectively. Deep fry the chicken pieces on High to Medium-High heat. Don't over fry it else the chicken turns fiber-ish. Keep the chicken soft.

Step 2

Soy sauce - 2 tbsp
Orange juice - 3 tbsp
Brown sugar - 4 tbsp
Vinegar - 5 tbsp
Orange zest of 2 oranges

Make a solution of soy sauce, orange juice, brown sugar, vinegar and orange zest. Keep it aside for use in Step 4.

Tip -
  • I used dark soy sauce and thus, the dark color. Light soy sauce can be used instead for a lighter color.
  • Be careful while getting the orange zest. If you scrap too deep on the orange skin, the zest will become bitter.

Step 3

Corn-flour - 1 tbsp
Water - 1/2 cup

Make a solution of corn-flour and water. Keep it aside for use in Step 4.

Step 4

Canola oil - 1 tbsp
Ginger paste - 1/2 tsp
Crushed Garlic - 1 tsp

Crushed red chilli - 1/4 tsp
Green onion - 1/4 cup (or, Red onion - 1/2 chopped)

Rice wine - 1 tbsp

Sesame oil - 1 tsp
Canola oil - 1 tbsp

Peanuts - as per taste.

Heat a wok on High heat. Once the wok is hot, add canola oil. When oil is heated up (don't let it smoke), add the ginger paste and crushed garlic and stir. Once browned, add crushed red chilli and and green onion (or red onion). Let the onion caramelize. Leave the onion slightly crunchy.

Add rice wine. Add the solution from Step 2 and bring it to a boil. Add the solution from Step 3 and let it thicken for between 5 to 10 minutes. Once thickened, add sesame oil and canola oil (1 tbsp). If you like green pepper, chop them into small cubes and add them as well.

Once the liquid is fully prepared, add the chicken from Step 1 and stir slowly. Leave it on heat for between 2 to 5 minutes.

Roast some peanuts and garnish before serving. Enjoy it with warm rice!


Just the way I have a magnetic-akin attraction to Orange Chicken and Pad Thai, I love collecting magnets from every place that I or R visit. I took this up after R and I got married. They are my treasure - each and every magnet evokes memories of the relaxed days of joy when visiting a certain place! Like Raymond says in "Everybody Loves Raymond" when talking about the demented family memories at his brother's wedding "Only keep the good ones". Isn't that sweet and very practical? :) Try practising it and it will zero out a number of unpleasant events from your life...some unpleasant events are just not worth holding onto. OK, enough of philosopher Pragyan talk! Coming back to the magnets, here is my entire collection.


Sending this for the "Fridge Magnet" event being hosted by Veda here. The due date for this event is August 11th, 2008. I always regret that I did not get one when visiting SFO :(


Note that some of the magnets are not place-specific. A few have a certain witty tongue-in-cheek comment and I just could not resist adding them to my collection. They bring a smile to my face any day as I glance them. Highlighting them below.


I am including a pic of one of my favourite accessories of my kitchen playground. This one has always evoked a comment from even the most silent of visitors to my house. Some friends and relatives who don't think too highly of my cooking skills even nod in agreement..."only keep the good ones", so you know how often such acquaintances cross my mind ;)


Lastly, I would like to thank Simran of Bombay Foodie for thinking of me while passing on the "Blogging Friend Forver" award. (Link) Appreciate it, dear!


The following rules apply to this award:
  1. Only five people are allowed to receive this award
  2. Four of them are followers of your blog.
  3. One has to be new to your blog and live in another part of the world.
  4. You must link back to who ever gave you the award.

I would like to take this opportunity to thank the following readers of my blog. Day to day interaction with each of you adds a special charm to the whole blogging experience. Keep it going, fellas! :)

  1. Shibani of Pearls of East
  2. Sagari of Indian Cooking
  3. Sra of When my soup came alive
  4. Sia of Monsoon Spice
  5. Sharmila is someone new on my blog and lives in India. She has an extensive collection of recipes and crafts. Check her out at Kichu Khon.

Tuesday, July 29, 2008

Rajma Galouti Kebab - Anniversary post!

Yes, yes and yes, this blog is one year old today. Time just flies. One day, I was contemplating whether I should start a food-related blog or not. I had been completely oblivious of the existence of this wonderful world of foodie blogs until I searched for a recipe and there was this pic-by-pic detailed explanation of the Aloo Curry recipe by dear Shilpa. Traveling from one link to the other, realized the maze of food blogs and the amazing camaraderie that everyone shares - a sisterhood of sort!

Started the blog one fine afternoon. It was a wonderful feeling on receiving my first few comments from Ashaji, Bee and Sandeepa. Wow - the very few people who inspired me to tread on this path never travelled before. Thank you, fellow-bloggers, for inspiring me to start off on this wonderful journey. I have learnt so much about cooking in the last year - so many techniques, so many cuisines, so many wonderful moments!

There are a few people who have been there in-person and encouraged me to go on. My hubby R has been a constant encouraging factor. Some of the best pics of my blog have been taken by him. Sir would wait patiently when I went about clicking the pics while he was just waiting to eat his dinner! A tradition, I am sure, most hubbies of foodie bloggers are aware of! :) I love it when you tell our friends about my blog - some pride there. If it was not for you and our love for good food, this blog would not have been here! Thank you, dear! You have never been so patient. :)

My parents were visiting me last year. They were so amazed at the response from visitors to the Odiya recipes particularly. Some recipes that they have every other day and never think of making when calling friends over. But those recipes have a uniqueness to it that is very specific to the Odiya cooking. I am always looking for such recipes. This year has been a eye-opener in terms of how certain things are only specific to Odiya cooking. As well as how some dishes are actually made in other cuisines but we have been thinking that it is only made in Odiya houses. Thanks, Maa and Baba, for everything!

Some of my friends have prodded me to go on blogging. Asking me when they will see the next post after "refreshing and visiting" patiently even when there was a dry spell (read "zero new post") for more than a month. You have helped me get back my blogging spirit many a few times! My college friends, Vrindu and Poonki, were the first few visitors to this blog. They are both in the opposite side of this world. Their statement that it feels like I am treating them with my posts has always been there in the back of my mind while posting. My friend Prajakta and my colleague Nathan have complained in a good-humored jovial manner when I stopped blogging due to work pressure. Thanks for being there, guys!

Thank you to Silu apa for the encouraging kind words. It was amazing getting to know that you read my posts. For background of others, it was my nephew's birthday and my aunt-in-law, mom and Silu apa got talking. She mentioned that there are a few Odiya cooking blogs and there was one from Pragyan from DC area. My loving aunt-in-law just jumped at the opportunity and she is like "This is her". That was a wonderful moment for me as a foodie blogger...I still smile thinking of that moment...my moment of joy and pride! :) We got talking. She is special for me and made me feel on cloud nine. Thank you to Silu apa and all the visitors to this dear blog of mine - an extension of me and my culinary journey! I look forward to many more years of blogging...miles and miles to go before I stop!


Now coming to the recipe, this one caught my attention when I was looking for some nice and different veggie dish to make when R's friend was visiting us. His wife is vegetarian. Since I was making Lamb Biryani for the three of us, wanted to make something equally exquisite for her as well. Found this post by our dear Tarla Dalal-ji (adding a "ji" at the end of someones name is a nice way of respecting someone in India) with some really unique recipes of veggie kebab and tikkis. Wanted to try them all that day, but time and stamina were not my best friend that day. Will definitely try the rest some other day...till then, I hope you enjoy this! Note - Galouti kebab is made with meat - this is a vegetarian version of the same.

Ingredients Makes about 30 kebabs

Soaked and pressure-cooked Rajma (kidney beans) - 2 cup
Paneer (cottage cheese) - 1 cup
Boiled, peeled and mashed Potatoes - 1 cup

Sliced onions - 2 medium
Finely chopped Ginger -3 tbsp
Finely chopped Green Chillies - 4-5 chopped or as per taste
Turmeric powder - 1 tsp
Curry powder - 1 tbsp
Garam Masala - 1 tbsp
Salt to taste
Chopped Coriander - 3 tbsp

Corn-flour - 1 cup

Canola oil - 1 tbsp + for deep frying


  • Heat the 1 tbsp canola oil in a kadhai on a medium flame and fry the onions till they are golden brown.
  • Add the ginger and green chillies and saute till the ginger is cooked.
  • Add the mashed Rajma-Potato-Paneer followed by Turmeric powder, Curry powder, Garam masala and salt. Cook till the mixture leaves the side of the utensil without sticking. Add the chopped Coriander leaves a minute or two before you stop cooking the mixture, while the mixture is still warm. You don't want to cook the mixture with the coriander leaves much else it loses its flavor.
  • Divide the mixture into equal portions and shape each portion into flat, round kebabs.
  • Make a thin batter of corn-flour. Dip the kebabs in this mixture before deep-frying. I tried doing them directly without the corn-flour as Tarlaji's recipe instructs but it kept breaking up.
  • Heat the oil for deep frying on a medium flame and deep-fry the kebabs till golden brown in colour from both sides.
  • Drain on absorbent paper and serve hot with sliced onions and green-chilli for added heat. :)

Sunday, July 27, 2008

Lata's Eggless Mango Cake


After Shilpa's Eggless Date Cake became a favorite in my family, the Eggless Mango Cake recipe by Lata definitely caught my attention as a must-try. On my day off from work, I set off on my attempt...and I was not disappointed. A day-off put to good use :) Here is the recipe with minor modifications from Lata's version. Thanks, Lata, for sharing this recipe!

Ingredients Makes 2 medium-sized cakes

Note - For convenience, ingredients are shown in the order in which you would like to measure if you want to get done with one measuring cup. Instead of having to repeatedly clean and wipe dry the measuring cup.

Whole wheat flour - 2 cups
Skim milk powder - 1/2 cup (I use Sanalac brand)
Baking powder - 1 tsp
Baking soda - 1 tsp

White sugar - 1 cup
Mango pulp - 1.5 cup + few tbsps for garnishing, as per taste
Hot water - 1/4 cup
Fat-free Yogurt - 1/2 cup
Canola oil - 1/2 cup

Crushed pista or cashewnuts - 1/2 cup + few tbsps for garnishing, as per taste
  • Sift together the wheat flour, milk powder, baking powder, and baking soda.
  • Add crushed Pista or cashewnuts.
  • Blend together mango pulp, water, sugar, yogurt, and canola oil. Pour this into flour mixture and fold slowly to get a uniform mixture. Do not mix much as it will affect the softness of the cake.
  • Grease the baking pan with cooking spray or ghee or butter. Pour the above mixture into this greased pan.
  • Bake at 350 degrees Fahreinheit for about 45 mins. Poke a knife into the cake and pull it out. If the cake is done, the knife will come out clean.

Use some mango pulp and pista\cashewnut as garnishing. Even whipping cream will do as garnish! We loved it as-is :)


Friday, July 25, 2008

Chicken Makhani

Chicken has always been my favourite. Since R prefers lamb over chicken, we don't have it that often. But when we do, I always try to make it in a different way so that it is something new and interesting for R to enjoy it as well. That's the reason I am always looking for new chicken recipes to try.

On one of our recent trips to the Indian grocery store, found the Chicken Makhani masala by Chef Sanjeev Kapoor. I had already tried and liked his Veg Jalfrazie masala. Thought of giving this a shot and it turned out good. And easy to make such a delicious and rich-looking dish. How often do you get that so easy!

Ingredients makes 4-6 servings

Sanjeev Kapoor's Chicken Makhani Masala - 1/2 pack
Chicken - 2 lb, approx. 20-25 pieces
Onion - 1 medium, chopped in long pieces
Heavy Cream - 1 tbsp
Canola oil - 1 tbsp
Sugar - a pinch
Salt - additional, as per taste (Check before adding since the Makhani masala has some salt)

  • Heat oil. Add sugar to brown. Add the chopped onions and cook till they caramelize. You don't want to cook it fully, want some of the crunch to still remain.
  • Add the masala and let it roast a little.
  • Add the chicken and stir it to uniformly coat the masala. Let it cook for in High heat for 10-15 minutes while stirring at regular intervals so that it does not stick to the side of the utensil.
  • Add water as per the consistency you would like and let it cook covered in Medium-Low heat for 10-15 minutes so that chicken is cooked and turns soft. Take care not to overcook else the chicken will turn fiber-ish!
  • Add heavy cream (optional) and salt as per taste to finish off.

Enjoy with warm paratha, roti or rice! We had it with Jeera Rice and Raita.

Thursday, July 24, 2008

Kingly Kalakand


When I first had milk-cake (cake version of kalakand) as a ten-year old, my first question was "why is it called that? neither does it have frosting, nor is it milk!". Ten-year olds are so dumb! No offense to any other ten-year old before my nieces and nephews start complaining :)

When I read Sandeepa from Bong Mom's Cookbook had a microwave version of the Kalakand, I just had to try it. R's sweet-tooth has always been a major encouraging factor for me to learn new Indian desserts. Just like his niece who has been born and raised here does not treat Indian desserts as desserts, R does not like western desserts like cakes and ice-cream. It has to be an Indian dessert to pass off and be accepted by his enormous sweet appetite..how selective :( His dislike for cakes and ice-cream is A blessing for me in disguise, to be frank! Else by now, I could have easily passed off as a master Sumo wrestler, I am pretty sure of that..

Ingredients Makes 20 pieces

Sweet Condensed Milk - 1 can
Ricotta Cheese - approx. 2 lb
Cardamom Powder - 2 tbsp
Sliced nuts for garnishing
  • Lightly grease a microwaveable bowl with ghee.

  • Mix the condensed milk with Ricotta cheese, both of which are 1:1 by volume. Make sure to press the ricotta cheese into the condensed milk can. Otherwise, you will have more liquid in your mixture and it just takes forever to make..trust me, it feels like FOREVER! Add the ground cardamom powder to this mixture and start the microwave ride..

  • Microwave for 5 minutes. Take caution such that the above mixture does not boil over in the process.

  • Stir the mixture well and microwave again for 5 minutes. If the mixture starts rising to spill over, stop and stir before commencing again.

  • Microwave for another 5 to 10 minutes, as required. Usually done between 15 to 20 minutes.

  • Keep aside to cool so that it can solidify a little to be able to cut into managable pieces.

  • Garnish with saffron and\or nuts, as per taste.

Sunday, July 6, 2008

Summer afternoon in a Oriya household with Pakhala...(Precautionary warning - Long post :))


As a kid, summer meant early closing of school, lassi in the evening and lots and lots of festivals (some specifically directed for particular section of people such as unmarried girls, married women). And the most important change in food, you can have lots of mangoes "amba" to eat and the soothing "Pakhala" for lunch. Read on if you would like to get a glimpse at some of my most coveted close-to-heart memories of summer in India and my attempt at trying to keep some of that going on in this far-far-away land of America!

Summer meant half-day school..which kid would not love that ;) Schools start early so that they can close early and everyone can get home early and avoid the heat. Not sure how much the "avoid the heat" objective of this idea worked...coz this meant for me and my friends more play-time in the evening, starting a little early in the afternoon :) This was in addition to a long summer vacation which usually commenced late April and ended late June. Note though that my teachers would load us with more homework than one can handle (ofcourse!). Actually, this year, the heat was so much that schools were closed early for summer vacation. Do you know that in the past few years, Orissa has recorded some of the highest temperatures in India? Sad!

Of course, how can I forget to add the hours of power outage that provided plenty of opportunity for family time ..talk about finding the silver lining in the cloud :) Early on, these outages were random and strewn throughout the day. This became a lot more organized where the electricity board would make postings in the daily newspaper (and eventually announcements on local TV channels) about the time in various areas where power outage "load-shedding" would occur!! Being in the capital of Orissa provided us some relief at times. Should check with Maa-Baba if the situation is still the same! >:(

One best thing about Bhubaneswar is that you get plenty of cool breeze in the evening, such a pleasant respite from the humid heat. In the summer breeze, sitting with family and friends and enjoying a cool glass of mango lassi is heavenly. With some spicy accompaniments such as Aloo chop, samosa (called "singada" in Orissa) for company, the world is so right! Miss those evenings :(

Now the heat does not deter the festivities from engulfing everyone. There are two special festivals during this time - Savitri Amabasya for married women to pray for their husbands (quite similar to the Karva Chauth of North India with different rituals based on the Savitri-Satyaban mythology) and a 3-day Rojo/Rajah for young girls to celebrate and enjoy the swings (actually this festival falls quite close to the onset of monsoon). During Savitri Amabasya, ladies fast for their husband's long life. They can eat any fruit though on that day, no rice nor any cooked foods.

Talking of fruits, mango is aplenty in this season and there are a number of varieties of the same in the market. Raw mangoes are pickled into a sweet pickle (yes, it is sweet which used to be a major surprise for my non-Oriya friends who were only used to the hot mango pickle!). We used to have mangoes after lunch cut into slices. Just could not wait to finish up lunch..

Coming to lunch, Pakhala is the one we would have most often during summer. I believe this is one of the most authentic Odiya food. If I am not mistaken, the rest of the eastern part of India also have some variant of this. Pakhala is rice soaked in water which is served with various other accompaniments. The rice can be tempered with different types of tempering based on taste.

In my in-laws place, they even have this for breakfast followed by a late lunch. Last time when I was in India, R's aunt had made some real delicacies - Ladyfinger in Mustard sauce and green beans in onion gravy. Though I tried to watch and learn, I just cannot mimic it here. Next time I am in India, I am going to make sure to learn it first! I crave for them every time we have Pakhala here!


The above pic shows pakhala with ladiesfinger fry ("bhendi bhaja"), mashed shrimp ("chingudi checha"), crushed badi ("badi chura") and mashed potato ("aloo chakata"). You could possibly have it with it with any curry, as long as it is not gravy-based.


Pakhala - serves 4

Raw rice - 1.5 cup
Yogurt - as per taste

Canola oil - 1 tsp
Mustard seed - 1/2 tsp
Curry leaves - 6-10
Crushed garlic - 1 tsp

Soak the cooked rice with water for a few hours. The longer you soak the rice, the ore it ferments and the more lethargic you will feel after eating it :) I usually for an hour or two. Some like it soaked overnight!

Before serving, garnish the soaked rice with some sour yogurt.

Additionally, you can "chaunk" it. Heat canola oil. Add mustard seed. Once it crackles, add 6-10 curry leaves and crushed garlic.


Ladiesfinger fry / "Bhendi bhaja" - serves 4

Ladyfinger - 20-30
Canola oil - 1 tbsp
Turmeric powder - 1/2 tsp
Salt - 1/2 tsp or as per taste
Chilli powder - as per taste

Clean the ladyfinger with water. Soak it dry with a paper towel and cut it into 1 inch pieces. You definitely don't want to cut and clean them - they end up very gooey and messy!


Heat canola oil. Add the cut ladyfinger. Stir in high heat till it stops sizzling and all the gooey stuff has vanished. Add turmeric powder, salt and chilli powder. Note - You can add a tbsp of onion-ginger-garlic paste after the ladyfinger is half-cooked, for additional taste. Cook in Medium heat for some time to complete the cooking.


Mashed shrimp / "Chingudi Checha" - serves 4

Small or medium-sized shrimp with head - 30-40 small or 15-25 medium
Green Chilli - 2
Garlic - 2-3 large cloves (Pod is the grouping of Cloves)
Red onion - 1/2 thinly chopped
Turmeric powder - 1/2 tsp - 1 tsp, as per taste
Salt - as per taste
Chilli powder - as per taste

Marinade the shrimp (after de-veining it, I leave the shell on for the extra crunch) with salt, chilli powder and turmeric powder for 15-20 mins.
Heat some canola oil and fry the marinated shrimp till well-cooked.
Using the food processor, lightly crush (not finely grind) the shrimp with garlic and green chilli.
Mix the above mixture with chopped onion and you are good to go! Yummy!


Crushed Badi / "Badi Chura" - serves 4

Badi - 20
Onion - 1/2 thinly chopped
Garlic - 1-2 pods
Green Chilli - 1

Lightly roast the badi with a little canola oil till it slightly browns.
Crush the badi either using a food processor or using a crusher with hand.
Add crushed garlic, thinly chopped green chilli and chopped onion.
You can add a few drops of mustard oil for added flavour.


Mashed Potato / "Aloo Chakata" - serves 4

Potato - 3-4 large
Onion - 1/2 large, thinly chopped
Ginger - 1/2 tsp
Cumin - Chilli Powder - 1 tsp (add more for added heat)
Salt - as per taste
Mustard oil - 1 tsp
Green chilli - 1-2

Boil potatoes to cook them. You can also use the pressure cooker to boil the potatoes. Mash the potatoes after peeling them with the rest of the ingredients.

Tuesday, June 17, 2008

Welcome back to me with my favourite poem

Hey All,

That was a BIG break from blogging. Did not mean to, but just kept pushing back inspite of the fact that I have got lots to share in terms of cooking, nature photography with some interesting travel information. Will try to keep my cool and slowly and steadily, share the info than impatiently gurgling them all out everything in one post :) One thing that I have noticed is that even when I take a break for a month; when I get back, our blogosphere would have undergone some interesting changes with certain valid\invalid turn of events.

Last time, when I got back, quite a few blogs had become "invite-only" and some dear bloggers had closed their comments. This time, I come back to the horrifying and shameful abuse by a support staff of a senior blogger as Inji Pennu (Link). Just when I started thinking that the world is not right, I read about how everyone is coming together for Brianna (Link). That is so touching and I will check if there is any way I can also chip in. The more closer we come to planning our family, the more incidents such as these affect me on a personal level. The world is beautiful with a minor number of insensitive people strewn around, isn't it? Amen and I sincerely hope that if this is not true, it becomes so soon......very soon.

Let me end this post with one of my favourite poem by Robert Frost. Memorizing it during school as homework was calkwalk compared to the other Victorian-era poems! Pandit Nehru, the first Prime Minister (yes, India has Prime Minister) of India, had this poem on his study-desk. Hope this poem will always inspire me "Lot of posts to go before I take a break. Lot of posts to go before I take a break." (One thing for sure, none of you are at the present moment regretting why I did not take up poetry as a profession! ;))


Stopping By Woods on a Snowy Evening - Robert Frost

Whose woods these are I think I know.
His house is in the village though;
He will not see me stopping here
To watch his woods fill up with snow.

My little horse must think it queer
To stop without a farmhouse near
Between the woods and frozen lake
The darkest evening of the year.

He gives his harness bells a shake
To ask if there is some mistake.
The only other sound's the sweep
Of easy wind and downy flake.

The woods are lovely, dark and deep.
But I have promises to keep,
And miles to go before I sleep,
And miles to go before I sleep.

Note - I have changed the template of my blog to reflect more of my personality that loves the beaches and water :) Sharing here some of my recent pics from the docile beaches of the Dominican Republic.


Have a great summer, everybody!